My experience while installing Nagios on my RHEL5 machine:
After hearing a lot about Nagios I finally thought I should give it a try, there started my 3 days of struggle. As I’m working in an IT company I do get very less time to experiment on anything.
On day one I started installing Nagios by following the steps given in the Nagios documentation, everything went fine and no errors were found and Nagios installed successfully I thought I have made it in the first attempt itself then I have opened the link http://<MY IP ADDRESS>/nagios in the browser while I started to browse through the options the problem started, except the home and documentation page none were working.
Error displayed as:
Not Found
The requested URL /nagios/cgi-bin/statusmap.cgi was not found on this server
And it also displayed another error regarding the permission issue, I tried a lot to troubleshoot the issue but unsuccessful.
The second day I Google on this issue and found that lot many people have faced the same problem I tried all the solutions but none were helping my cause. Two days went by in dejection.
Third day I started off right from scratch and succeeded, so finally my nagios started working on my machine for the first time it was like a sigh of relief to me .
“As I’m a newbie in this Linux ocean, every minor success is like a power booster to me. ”
So with this success I can go and try more configurations on my machine and I’ll keep updating you..
“I have started my long journey into Linux with first step “
Here I’m posting the steps I have followed to configure my nagios, so that none of you should waste your valuable time.
Steps to install Nagios on Linux:
1) Before installing Nagios, ensure that the following packages are installed:
a) Apache
b) PHP
c) GCC Compiler
d) GD development libraries
If not, login as root and install it.
[root@localhost ~]$yum install httpd php gcc glibc glibc-common
[root@localhost ~]$:yum install gd gd-devel
2) Now we have to create a user account and a group for Nagios. Also add the apache user account to the created group.
Become root user and type:
[root@localhost ~]$useradd -m nagios
[root@localhost ~]$passwd nagios
[root@localhost ~]$groupadd nagcmd
[root@localhost ~]$usermod -a -G nagcmd nagios
[root@localhost ~]$usermod -a -G nagcmd apache
3) Create a temporary folder for the downloads and download the latest version of Nagios Core and plugins.
http://www.nagios.com/download
[root@localhost ~]$mkdir downloads
[root@localhost ~]$cd downloads
4) Extract the Nagios tarball
[root@localhost ~]$cd downloads
[root@localhost downloads]$tar xvzf nagios-3.x.x.tar.gz
[root@localhost downloads]$cd nagios-3.x.x
5) After this, we need to compile and install.
[root@localhost nagios-3.x.x]$ ./configure -–with-command-group=nagcmd
[root@localhost nagios-3.x.x]$make all
[root@localhost nagios-3.x.x]$make install
[root@localhost nagios-3.x.x]$make install-init
[root@localhost nagios-3.x.x]$make install-config
[root@localhost nagios-3.x.x]$make install-commandmode
6) Install the Nagios web config file in the Apache conf.d directory.
[root@localhost nagios-3.x.x]$make install-webconf
7) Use the htpasswd to create an account for logging into the Nagios web interface.
[root@localhost nagios-3.x.x]$ htpasswd -c /usr/local/nagios/etc/htpasswd.users nagiosadmin
8) Extract the Nagios plugins tarball
[root@localhost ~]$cd downloads
[root@localhost downloads]$tar xvzf nagios-plugins-1.4.x.tar.gz
[root@localhost ~downloads]$cd nagios-plugins-1.4.x
9) After this, we need to compile and install.
[root@localhost nagios-plugins-1.4.x]$ ./configure --with-nagios-user=nagios --with-nagios-group=nagios
[root@localhost nagios-plugins-1.4.x]$make
[root@localhost nagios-plugins-1.4.x]$make install
10) Check the Nagios configuration for errors.
[root@localhost ~]$/usr/local/nagios/bin/nagios -v /usr/local/nagios/etc/nagios.cfg
11) If there are no errors, start Nagios
[root@localhost ~]$service nagios start
Or
[root@localhost ~]$/etc/init.d/nagios start
12) To start Nagios when the system boots type:
[root@localhost ~]$chkconfig --add nagios
[root@localhost ~]$chkconfig nagios on
13) If you have SELinux installed and with the enforcing mode by default, you probably get some errors in Nagios web interface.
You'll need to change the SELinux context of some Nagios folders.
chcon -R -t httpd_sys_content_t /usr/local/nagios/sbin/
chcon -R -t httpd_sys_content_t /usr/local/nagios/share/
chcon -R -t httpd_sys_script_rw_t /usr/local/nagios/var/rw/
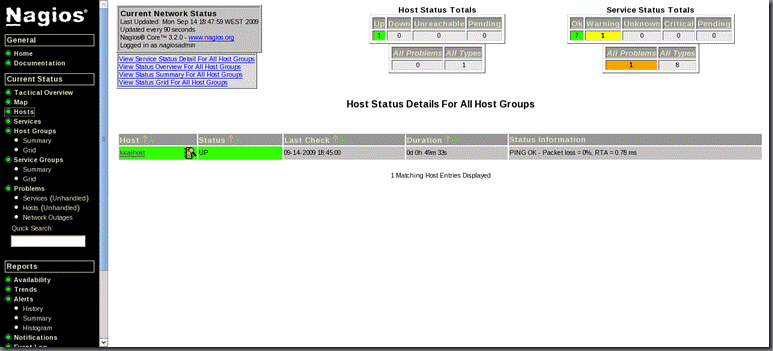
![clip_image002[9]](https://blogger.googleusercontent.com/img/b/R29vZ2xl/AVvXsEhet2l8HbzlvhyphenhyphenbG2gNI5u5ynpQ8kSXd3VV-S5MxvumcRxJCIRitCkAQKeJfcdrODk0FJThPD5Ff-l3qf-Au-TejZkGAuMCPwDKe1H4sE0paa9m3_fF_lNd1etLC3md3ZmvdoZwbTrhzARO/?imgmax=800 "clip_image002[9]")
Thats all floks !!!!


![clip_image002[9]](https://blogger.googleusercontent.com/img/b/R29vZ2xl/AVvXsEhFKKpRuOi2JqGADQkACdZhiSJxT4YnqWCdie7yYwZ4md2RvyFT27rVcpG8pV7YwlqOBIxJvHp4dUfiHv_H-_FEtlwAk8JiUAqFnvowF7ay2q2a94n4USXpkal8fMUrcPkAq_g9nlQKipbD/s1600-h/clip_image002%5B9%5D%5B5%5D.gif "clip_image002[9]")


